Installation & Setup
This guide will walk you through setting up everything you need to start modding ULTRAKILL.
Prerequisites To Modding
Before you begin, make sure you have:
Required Software
- ULTRAKILL (or really any unity game but this wiki focuses on Ultrakill) - Make sure it's installed and runs properly
- Jetbrains Rider Community Edition or Visual Studio 2022 Community - For writing C# code, the wiki focuses on Rider because its cross platform
- Download Jetbrains Rider
- Download Visual Studio Community
- dnSpy - For examining game code and finding methods to patch
- Download dnSpy (get the latest release)
Basic Knowledge
- C# fundamentals - Variables, methods, classes, and basic syntax
- File management - Copying files, navigating folders, editing text files
- Problem-solving patience - Modding involves lots of trial and error
Check out Microsoft's C# fundamentals tutorial before diving into modding, but you can also learn C# while modding, this is just a suggestion. Or check out some unity tutorials, they will help you understand how unity works and how the mods interact.
BepInEx Setup
BepInEx is the mod loader that makes ULTRAKILL modding possible. Follow these steps carefully:
Step 1: Download BepInEx
Download BepInEx from Thunderstore: BepInExPack 5.4.2100
Always use the specific BepInEx version recommended for ULTRAKILL modding. Newer versions might not be compatible and will break if people on a different version try to run your mod.
Step 2: Extract and Install
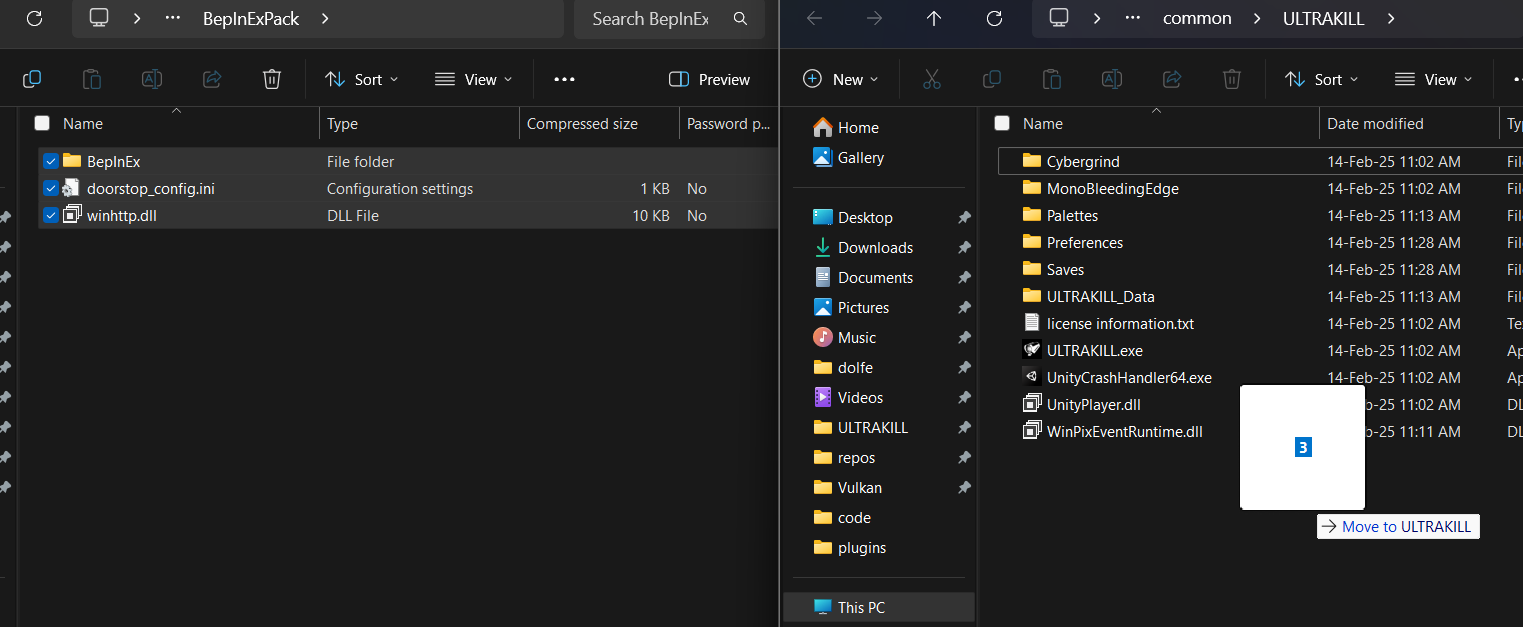
- Extract the zip file and open the extracted folder
- Open the BepInEx folder inside the extracted files
- Copy all contents from this BepInEx folder, not the folder where the icon is
- Navigate to your ULTRAKILL installation (where ULTRAKILL.exe is located)
- Steam: Usually
C:\Program Files (x86)\Steam\steamapps\common\ULTRAKILL - Other platforms: Check your game library
- Steam: Usually
- Paste all files into the ULTRAKILL folder and replace anything necessary

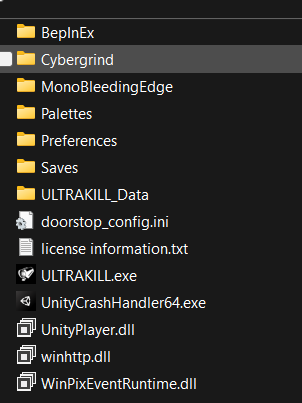
Your ULTRAKILL folder should now look like this:

Step 3: Initial Setup
- Launch ULTRAKILL and let it reach the main menu
- Close ULTRAKILL - This creates the necessary BepInEx configuration files
Step 4: Configure BepInEx for Development
- Open the BepInEx folder in your ULTRAKILL directory
- Open the config folder
- Edit BepInEx.cfg with Notepad or any text editor
Make these changes:
# Find this line and change it:
HideManagerGameObject = true

# Under [Logging.Console] section, change:
Enabled = true
If you're only installing mods (not creating them), keep the console disabled by leaving Enabled = false.
Step 5: Verify BepInEx is working
- Launch ULTRAKILL again
- Look for a console window that opens alongside the game - this confirms BepInEx is working
- Check the console output for any error messages, ignore any errors from ultrakill, just your own mod, you can also look at ULTRAKILL's built in console by pressing
Development Tools Setup
Jetbrains Rider Setup
- Download and install Jetbrains Rider from the official website.
- TODO
DnSpy Setup
- Download dnSpy from the GitHub releases page.
- Extract the downloaded zip file to a folder of your choice.
- Run dnSpy.exe to open the application.
- Open the ULTRAKILL assembly:
- Click
File>Open... - Navigate to your ULTRAKILL installation folder
- Select
ULTRAKILL_Data\Managed\Assembly-CSharp.dll
- Click
- Optional but recommended try to open a .dll file and set DnSpy as the default program for .dll files so you can open them by double clicking them.
What's Next?
With BepInEx installed and working you're ready to create your first mod!
The next guide will walk you through creating a simple "Hello World" plugin to verify everything is working correctly and to teach the basics.